Generally, the user tries to run network troubleshooter when they are not able to connect to the wireless network, or they see a limited network connection. Still, troubleshooter only returns the error “WiFi doesn’t have a valid IP configuration error.” So without wasting any time let’s see how to actually fix this issue with the below-listed troubleshooting guide.
Fix WiFi doesn’t have a valid IP configuration error
Make sure to create a restore point just in case something goes wrong.
Fix WiFi doesn’t have a valid IP configuration error Method 1: Flush DNS and Reset TCP/IP Method 2: Disable and Enable your NIC (Network Interface Card) Method 3: Uninstall Wireless Network Adapter Drivers Method 4: Update Network Adapter Driver Method 5: Change Network Adapter Settings Method 6: Disable IPv6 Method 7: Use Google DNS Method 8: Enable Wireless Network Related Services Method 9: Set the channel width to Auto Method 10: Perform a Clean Boot
Method 1: Flush DNS and Reset TCP/IP
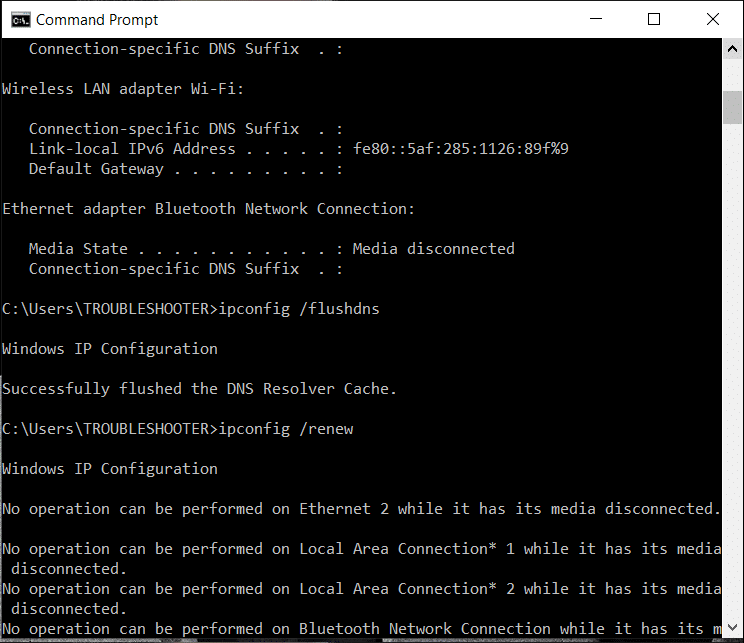
Right-click on Windows Button and select “Command Prompt(Admin).”
Now type the following command and press Enter after each one: ipconfig /release ipconfig /flushdns ipconfig /renew
Again, open Admin Command Prompt and type the following and hit enter after each one:
Reboot to apply changes. Flushing DNS seems to Fix WiFi doesn’t have a valid IP configuration error.
Method 2: Disable and Enable your NIC (Network Interface Card)
Press Windows key + R, then type ncpa.cpl and hit enter.
Now right click on the NIC that is facing issue the issue.
Select Disable and again Enable it after few minutes.
Wait till it successfully receives an IP address.
If the issue persists type the following commands in cmd:
6. Restart your PC and check if you’re able to resolve the error.
Method 3: Uninstall Wireless Network Adapter Drivers
Press Windows Key + R then type devmgmt.msc and hit Enter to open Device Manager.
Expand Network Adapters and find your network adapter name.
Make sure you note down the adapter name just in case something goes wrong.
Right-click on your network adapter and uninstall it.
If ask for confirmation, select Yes.
Restart your PC and try to reconnect to your network.
If you’re not able to connect to your network, then it means the driver software isn’t automatically installed.
Now you need to visit your manufacturer’s website and download the driver from there.
Install the driver and reboot your PC.
Method 4: Update Network Adapter Driver
Press Windows key + R and type devmgmt.msc in Run dialogue box to open device manager.
Expand Network adapters, then right-click on your Wi-Fi controller (for example Broadcom or Intel) and select Update Driver Software.
Now select “Search for automatically for updated driver software“.
Now Windows will automatically search for the Network driver update, and if a new update is found, it will automatically download and install it.
Once finished, close everything and reboot your PC.
If you’re still facing the WiFi Connected but no Internet Access issue, then right-click on your WiFi and select Update driver in Device Manager.
Now, in the Update Driver Software Windows, select “Browse my computer for driver software.”
Now select “Let me pick from a list of available drivers on my computer.”
Try to update drivers from the listed versions (make sure to checkmark compatible hardware).
If the above didn’t work then go to the manufacturer’s website to update drivers.
Download and install the latest driver from the manufacturer’s website, then restart your PC.
Method 5: Change Network Adapter Settings
Press Windows key + R, then type ncpa.cpl and hit enter.
Now right-click on your WiFi (NIC) and select Properties.
Select Internet Protocol Version 4 (TCP/Ipv4) and click Properties.
Make sure the following are checked: 5. Click Ok and exit WiFi properties.
6. Reboot to apply changes.
Method 6: Disable IPv6
Right-click on the WiFi icon on the system tray and then click on “Open Network and Sharing Center.”
Now click on your current connection to open Settings. Note: If you can’t connect to your network, then use an Ethernet cable to connect and then follow this step.
Click the Properties button in the window that just open.
Make sure to uncheck Internet Protocol Version 6 (TCP/IP).
Click OK, then click Close. Reboot your PC to save changes.
Method 7: Use Google DNS
Go to your Wi-Fi properties.
Now select Internet Protocol Version 4 (TCP/IPv4) and click Properties.
Check the box saying “Use the following DNS server addresses” and enter the following:
Click OK to save, then click close and restart your PC.
Method 8: Enable Wireless Network Related Services
Press Windows Key + R then type services.msc and hit Enter.
Now make sure the following services are started and their Startup type is set to Automatic: DHCP Client Network Connected Devices Auto-Setup Network Connection Broker Network Connections Network Connectivity Assistant Network List Service Network Location Awareness Network Setup Service Network Store Interface Service WLAN AutoConfig
Right-click on each of them and select Properties.
Make sure the Startup type is set to Automatic and click Start if the service is not running.
Click Apply, followed by OK.
Reboot your PC to save changes.
Method 9: Set the channel width to Auto
Press Windows Key + R then type ncpa.cpl and hit Enter to open Network Connections.
Now right-click on your current WiFi connection and select Properties.
Click the Configure button in the Wi-Fi properties window.
Switch to the Advanced tab and select the 802.11 Channel Width.
Change the value of 802.11 Channel Width to Auto then click OK.
Close everything and reboot your PC to save changes.
Method 10: Perform a Clean Boot
Sometimes 3rd party software can conflict with System, and therefore the System might not shut down completely. If Fix WiFi doesn’t have a valid IP configuration error, you need to perform a clean boot in your PC and diagnose the issue step by step.
Recommended:
Fix Host Process for Windows Services has stopped working Fix The application has failed to start because the side-by-side configuration is incorrect How to fix Can’t connect to this network error Fix Windows Keyboard Shortcuts Not Working
That’s it you have successfully Fix WiFi doesn’t have a valid IP configuration error but if you still have any questions regarding this guide then feel free to ask them in the comment’s section.


![]()


